Selecting realistic dummy cameras involves balancing aesthetics and functionality. Choose models mimicking genuine security cameras with diverse lenses and mounting options for versatility. Avoid simplistic designs, opt for detailed replicas with accurate textures to blend into mock surveillance systems. Position them strategically based on real-world practices, considering angle of view, spacing, and blind spots. Test each camera's field of view, resolution, and night vision, fine-tuning sensitivity levels for accurate alerts.
Creating a convincing mock surveillance system for training, testing, or security assessments requires careful consideration. This guide delves into the art of installing a realistic dummy camera system, from selecting diverse and lifelike Realistic Dummy Camera Shapes to planning an optimal layout. Learn how to strategically position cameras, integrate them with software, and fine-tune for maximum realism, ensuring a comprehensive and effective security simulation.
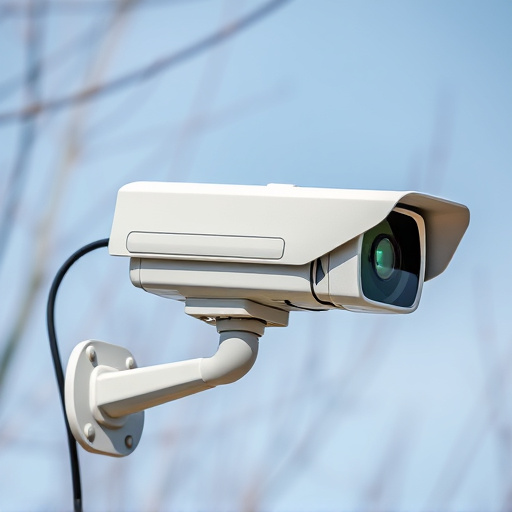
- Selecting Realistic Dummy Camera Shapes
- Planning Mock Surveillance System Layout
- Installing and Positioning Dummy Cameras
- Integrating Dummy Cameras with Software
- Testing and Fine-Tuning the Mock System
Selecting Realistic Dummy Camera Shapes
When selecting realistic dummy camera shapes, it’s crucial to consider both aesthetic appeal and functionality. Opt for models that closely resemble actual security cameras with various lenses and mounting options available in the market. This not only enhances the overall authenticity of your mock surveillance system but also ensures versatile placement possibilities.
Avoid overly simplistic or generic shapes that might look obvious as fakes. Instead, go for detailed designs featuring realistic textures, such as metal or plastic finishes, to mimic real camera components accurately. By choosing the right dummy camera shapes, you can create a convincing visual representation of an active surveillance setup, making your mock installation more effective and immersive.
Planning Mock Surveillance System Layout
When planning a mock surveillance system layout, one key consideration is choosing the right dummy camera shapes to create a realistic environment. Opt for realistic-looking cameras that mimic the size, design, and color of actual security cameras. This adds an immediate layer of authenticity to your setup, making it easier for individuals to subconsciously trust or question the veracity of what they’re seeing.
In terms of placement, envisioning the layout as a real-world surveillance network is essential. Consider factors like angle of view, camera spacing, and blind spots to create a comprehensive and convincing visual simulation. Arrange dummy cameras strategically in common areas like lobbies, corridors, and open offices to mimic dense coverage, just as you would in a genuine security setup. This detailed planning will ensure your mock surveillance system appears professional and serves its intended purpose effectively.
Installing and Positioning Dummy Cameras
When installing dummy cameras, one crucial aspect is choosing a realistic shape that blends seamlessly into the environment. Opt for models that closely resemble genuine security cameras with accurate details such as lenses and housing. This strategic selection enhances the simulation’s authenticity, making it harder to distinguish from real surveillance equipment. Positioning is key; place them in areas offering unobstructed views while ensuring they align with actual camera angles for maximum realism.
Consider factors like lighting and potential blind spots. Mount these cameras at heights comparable to genuine installations, typically 2-3 meters above ground level. Remember, the goal is to create a convincing simulation that can deter potential intruders without raising unnecessary alarms or suspicions.
Integrating Dummy Cameras with Software
When integrating realistic dummy cameras with surveillance software, the first step is to select cameras that mimic genuine security equipment as closely as possible. Opt for dummy cameras with detailed, life-like designs and features like adjustable mounts and varying lens types to ensure they blend seamlessly into real installations. This crucial step enhances the overall realism of your mock system, making it harder to distinguish from a genuine setup.
Choosing the right software is equally important. Look for programs that support multiple camera feeds and offer functions like remote viewing, motion detection, and recording capabilities. Ensure compatibility with your selected dummy cameras, allowing for synchronized operation and seamless data management. Integrating these components effectively will result in a convincing mock surveillance system that serves its intended purpose without breaking the bank.
Testing and Fine-Tuning the Mock System
After installing your mock surveillance system, it’s crucial to test and fine-tune its performance before full deployment. Start by configuring each dummy camera to mimic real surveillance needs—adjust field of view, resolution, and night vision capabilities as required for different areas you’re monitoring. The choice of a realistic dummy camera shape is essential here; opt for models that closely resemble actual security cameras to avoid unnecessary suspicion during testing.
Ensure smooth video feed by checking connectivity, frame rate, and latency across all devices. Adjust network settings if needed to optimize performance. Test the system’s response to various triggers—motion detection, alarm activation—and verify the accuracy of alerts. Fine-tune sensitivity levels until you achieve a balance between minimizing false positives and ensuring timely responses to genuine incidents.
After carefully selecting your Realistic Dummy Camera Shape and planning the optimal mock surveillance system layout, installing and positioning the cameras, and integrating them with software, it’s time to test and fine-tune. This final step ensures your dummy camera setup provides accurate simulations for training purposes or security testing. By following these comprehensive steps, you’ll create a robust and convincing mock surveillance system that serves its intended purpose efficiently.